How to Add Schema Markup to Your Webflow Site
Structured data markup, also known as schema markup, enhances your website’s user experience by providing visually appealing search snippets — also called as rich results. Schema markup can boost your website’s ranking and increase your website’s click-through-rate. This article shows how to implement schema markup to your Webflow site.
Note:
- Schema.org contains different types of structured data markups. This article focuses on adding the
Articlestructured data markup to a CMS-powered blog page in Webflow. - This article follows Google’s structured data markup documentation to implement the
Articlestructured data markup.
This article is for Webflow developers and individuals managing websites using Webflow. A solid understanding of the Webflow CMS is assumed.
Javascript Object Notation for Linked Data (JSON-LD)
Schema markups are often embedded into web pages using the JSON-LD format. JSON-LD structures and presents data in a form that is easy for humans and machines to understand.
Copying JSON-LD to Webflow
- Go to Google’s structured data markup documentation and click on the ‘Get Started’ button under the
Articlestructured data markup.

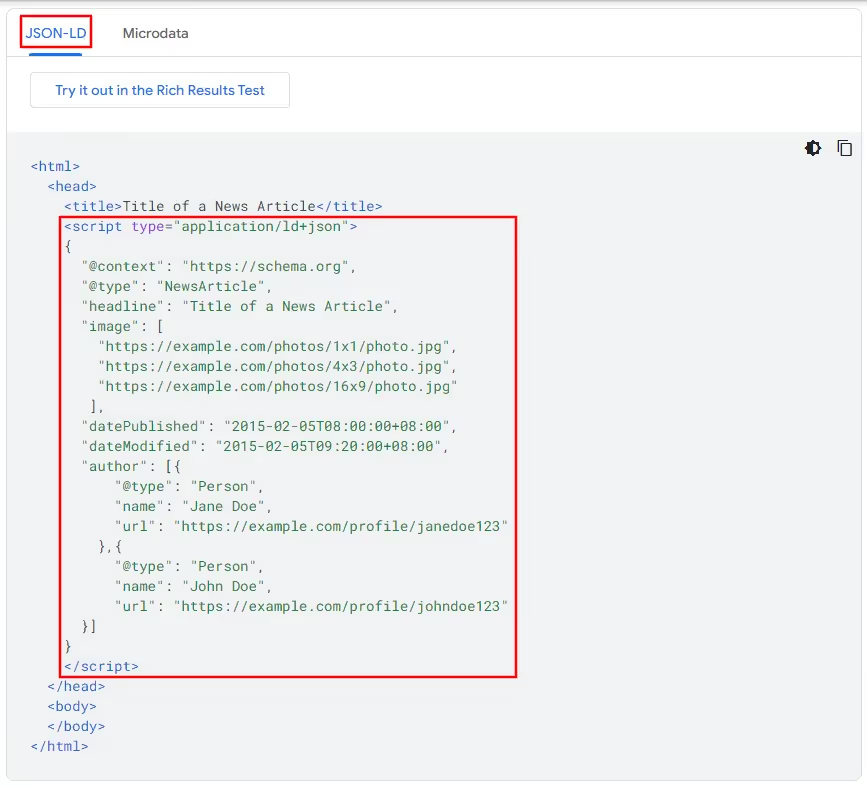
- Scroll down to JSON-LD format inside the
Articlestructured data markup page and copy the script.

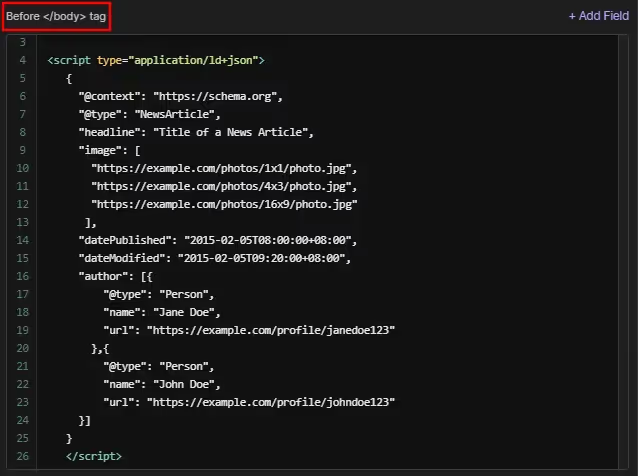
- Go to your Webflow project and paste the script in the ‘Before tag’ section of your CMS Collection Template page.

Note: Depending on the type of content, the Article structured data markup can take different @type properties. Google recommends using the following @type properties for the Article structured data markup:
“@type”: “Article”— Used for almost all types of article content."@type": "NewsArticle"— Used exclusively for content reporting news.“@type”: “BlogPosting”— Used exclusively for blog posts.
Adding the @id property
To dynamically add the Article structured data markup to all the blog pages in the collection list, it is important to add a unique identifier property, @id ,to the above script.
- Replace 'www.example.com' with your website’s URL.
- Replace COLLECTION-LIST-NAME with the name of your collection list.
- Connect your collection item’s slug field in place of COLLECTION-ITEM-SLUG-FIELD.

Note: The above image is only for reference. Your COLLECTION-LIST-NAME and COLLECTION-ITEM-SLUG-FIELD might take different values depending on your project.
Connecting CMS fields to each property value
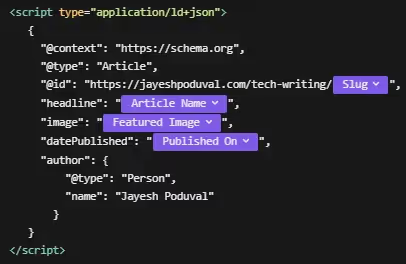
As with COLLECTION-ITEM-SLUG-FIELD, map remaining property values to their appropriate CMS item fields. The following reference image presents the end result after linking all property values to their corresponding CMS item fields.

Note:
- You can have as many properties as you want in your schema markup. View all the recommended properties for the
Articlestructured data markup here. - It is important to only add data visible to the users. For example, if the page does not contain a ‘Article Updated Date’, do not add the
dateUpdatedproperty to the schema markup. You can learn more about the structured data guidelines here.
Other references
- Learn more about implementing schema markup to your Webflow site in this forum — https://discourse.webflow.com/t/schema-org-structured-data-in-webflow/56925
- Watch Jose Ocando’s tutorial on how to add schema markup to your Webflow project — https://youtu.be/LTqi1l0Qzv4?si=J29HWU18cklWNt47